
Hello friends! Welcome to TechSikho.in.
These days, something new is coming out in the world of AI every day, and Google is also launching many AI tools. But I’ve found one Google AI tool that has completely changed the entire game of image generation.
Are you also tired of writing complicated prompts in Midjourney or DALL-E 3? If so, this article is for you. I’ve been using Google Labs Whisk for the past few days, and today I’m going to share my personal experience with you. So read this article carefully.
What is Google Whisk AI?
Friends, to put it simply, Whisk is an experimental tool from Google Labs that focuses on “Image-to-Image” generation. Not only that, it also generates text-to-image in high quality. If you’re not comfortable writing prompts, you don’t need to type anything here. Just upload a photo, and Google will remix it in a new style.
It also animates the images, with an animation length of 5 seconds. You can easily animate the images you generate.
To be honest, when I first used it, I thought it would just be a normal filter, but man… I was blown away by the quality of its animations! It runs on Google’s latest Imagen 3 and Veo models, which makes it pretty powerful.
Whisk Core Features: Subject, Scene & Style
When I started using Google Whisk AI, the first thing I realized was that this tool isn’t just prompt-heavy but visual-first. That means you show more than you write, and the AI easily understands it.
This means that even if you don’t write prompts and only just add an image, the AI will easily understand it and remix it to create a new version for you.
I usually look at Whisk in three parts:
1. Subject: “What do I want to create?”
The subject is basically your hero or main object.
It can be:
- Your Product Photo.
- A person’s portrait.
- A character.
- Or a simple object (like a cup, phone, book)
In my experience, the clearer the subject is, the better the AI will generate the result for you.
2. Scene: “Where should this take place?”
The scene is your background or Location. The scene determines what your subject’s background will look like. It basically adds a location to your object’s background.
This is where you decide what kind of background you want for your subject. Like:
- Need a beach vibe?
- An office look?
- A cyberpunk city?
- Studio lighting?
3. Style: “How the image will look”
Style is the part where creativity is unlocked. With the help of style, you decide how your images will look.
For example:
Style decides how your image will look, like:
- Realistic or Cartoonish.
- Pixel-style cute or cinematic dark.
- Watercolor vibe or neon cyberpunk.
You can even paste any reference image here, like Artwork, AI Image, Pinterest Inspiration, Even Movie Style.
4. Dice Button: “Surprise Me” Feature
Now let’s talk about my favorite button, which is the Dice 😄 You can basically use this when you’re confused about what prompt to give the AI. It basically tells the AI “Bro, show me something new.”
And when you press the dice on the same inputs, Whisk:
- Creates new compositions.
- Tries different lighting.
- Sometimes changes the angle.
When I’m confused about which version will be best, I just press the dice 2–3 times and usually get at least one usable output.
How to Use Google Whisk AI to Generate Images (Step-by-Step).
Now I will tell you the step-by-step process for how you can generate your desired image with Whisk.
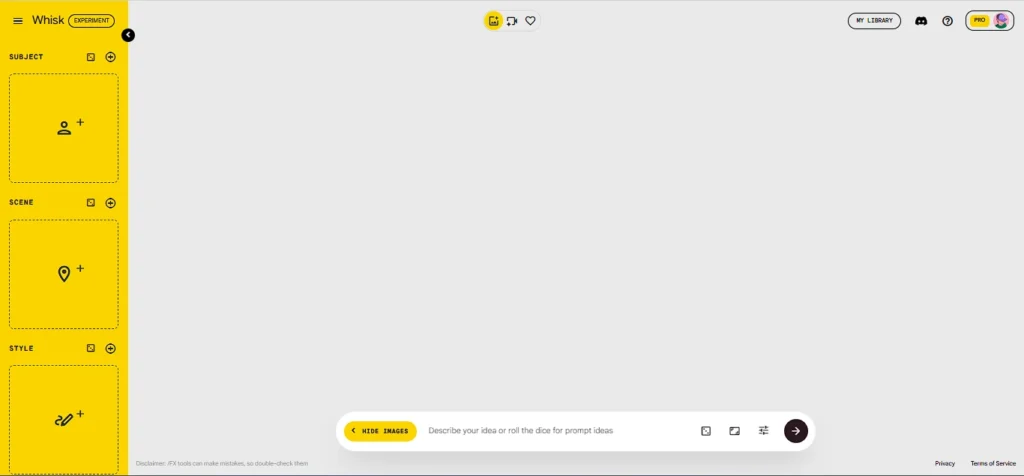
Step 1: Account Setup:
Go to labs.google/fx/tools/whisk.
First, you will need to create an account. You can simply create a free account with your email.
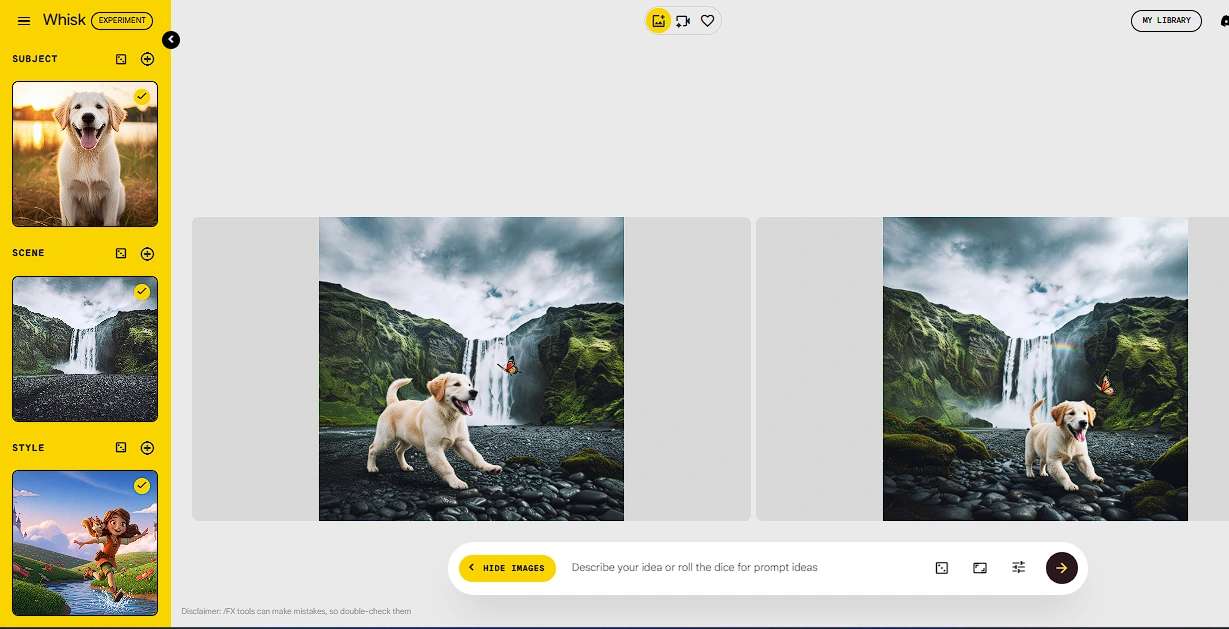
After logging in, a dashboard will open in front of you, as shown in the image.
Step 2: Image Generation.
Now upload your image to the subject. If you don’t have an image, you can also generate one here by providing a prompt.
Then, insert the generated image into the subject.
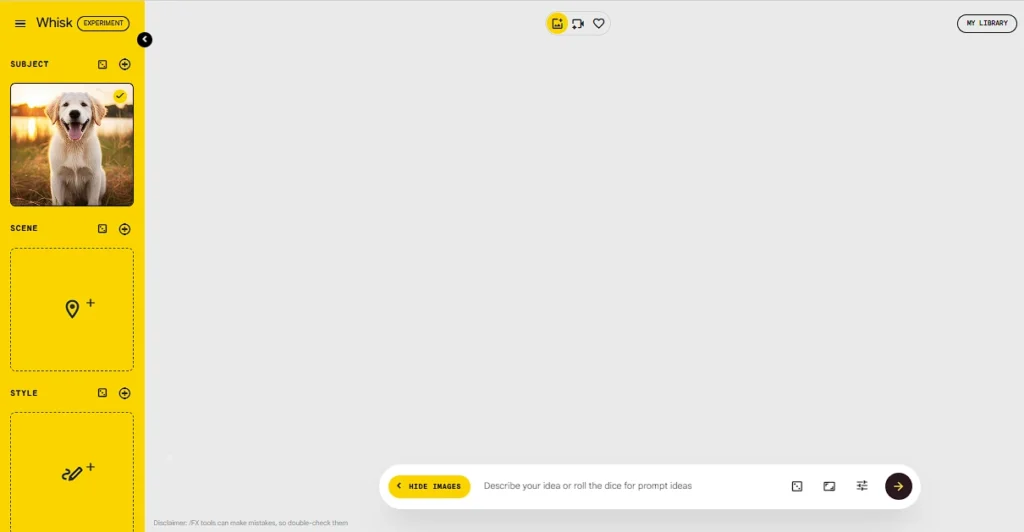
Step 3: Scene Generation.
You can specify the type of background or location you want for your image in the scene. You have two options:

- Either you can upload an image.
- Or you can also add your desired background to the subject by providing a prompt.
Step 3: Style.
You can specify the look you want for your image here. For example, Cyberpunk, Oil Painting, or 3D Disney style.
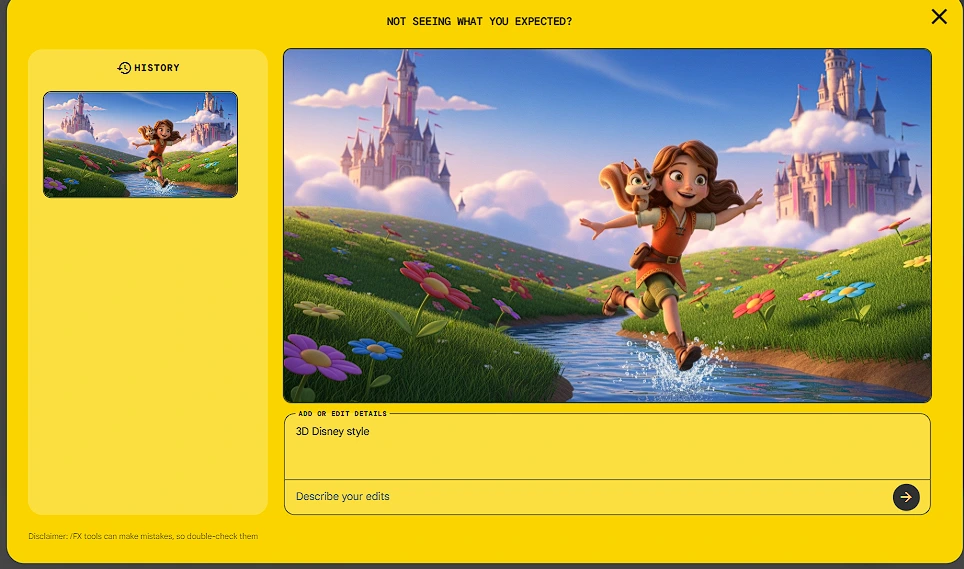
- You can upload a reference image.
- Or you can also specify the style using a prompt.
Step 4: Generate
Once you’ve finalized the subject, scene, and style, click ‘Generate’ to create your new image.
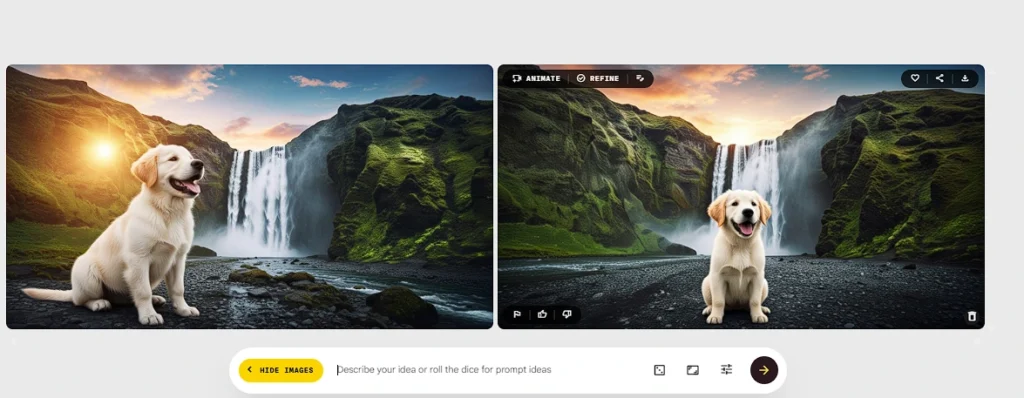
After generation, you will get 2 variants, as shown in the image below. You can download the one you like.
How to Create Videos Using Whisk Animate (Image to Video)
Use this feature tab when you want to convert your image into a short animated clip.
Animation Control Process:
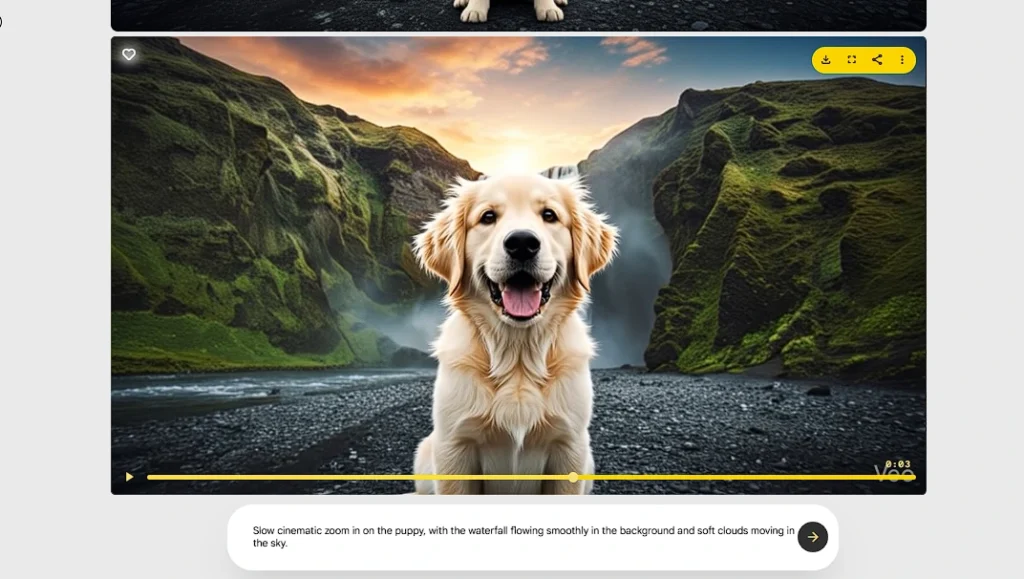
Hover your mouse over the generated image and click the Animate icon. A new prompt box will now appear. This is the most important step.
Here you need to tell it how the animation should be.
Example:
- Camera Motion: If you want the camera to move, write: “Slow cinematic zoom in.”
- Visual Motion: If you want a part of the image to move, write: “Hair blowing in the wind” or “Clouds moving slowly in the background.”
Google’s Veo model will then generate a cinematic 5-10 second animation following the instructions you provided.
I animated my generated image, and I was shocked because its animation was very smooth and high-quality. You should definitely try this feature too.
Advanced Tips & Prompts for Better Results
I want to share one thing from my experience, it’s not enough to just use Whisk but you need to use it the “right” way.
- Be Specific: The more specific details you provide in the “Subject” and “Scene” boxes (like lighting, colors, textures), the better and more premium the result you’ll get.
- Style Consistency: If you’re a content creator working on the same project, keep the “Style” preset the same so all your images look consistent.
- Animation Control: Use physics-based words in your animation prompt (like Gravity, Flow, Drift) to get better video output from Google’s AI.
Frequently Asked Questions (FAQs)
Is Google Whisk AI free?
Yes, right now Google Whisk AI is completely free because it’s an “Experimental” project in Google Labs. Google often keeps its new AI features free for users during the testing phase so it can gather feedback.
How to use Google Whisk in India?
In India, Google Whisk is very easy to use. You just need to go to google whisk and sign in with your personal Google Account.
Do I need a high-end PC or laptop to run Google Whisk AI?
No, absolutely not! Whisk AI is completely cloud-based. That means all the heavy processing happens on Google’s servers.
Conclusion
In my opinion, Google Whisk is a super powerful creative tool for beginners because you can easily generate images and animate them.
Whether you’re creating a new image from scratch or remixing and animating an existing photo, Whisk gives you control at every step. Its easy interface and powerful animation engine make it a must-try tool for every creator.
I hope this guide has given you helpful information about Google Whisk AI. And I hope you now understand how you can generate images using this tool. If you run into any issues with setup or generation, be sure to let me know in the comments below!
Also Read: iPhone 18 Pro Max: Launch Date, Specs, Price in India & Honest Take (2026)
8 Best AI Tools for Coding in 2026 | Beginner to Pro Guide
Sam Altman Net Worth 2026: Age, Education & Best AI Coding Advice